
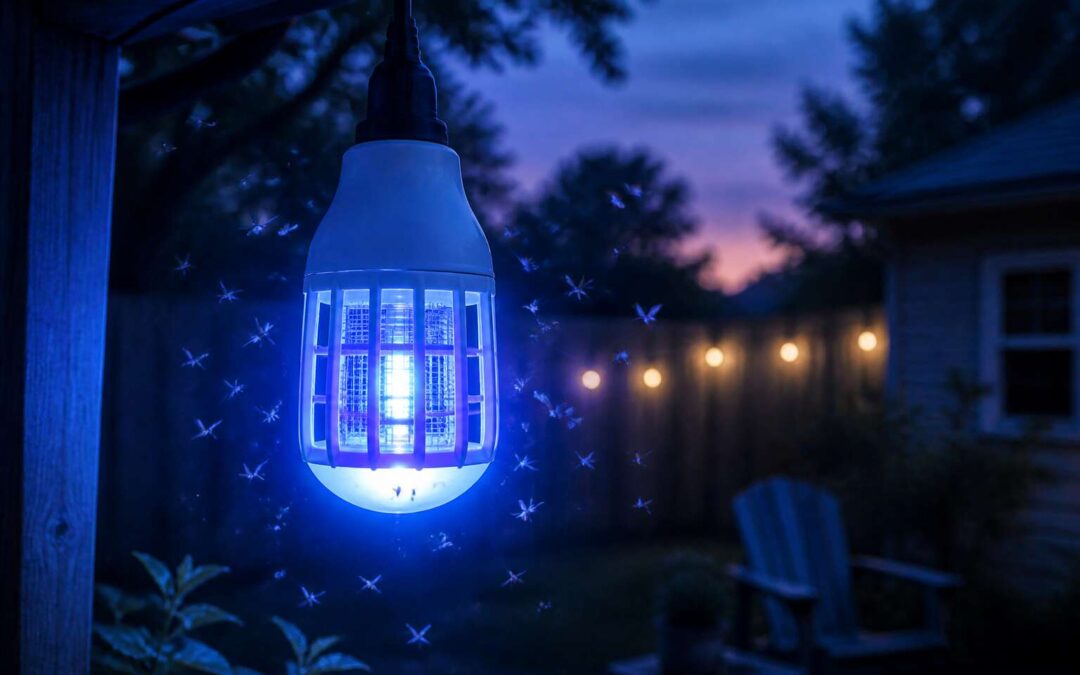
The Science Behind UV Insect Attraction
How Ultraviolet Light Lures Flying Pests
Researchers have found that flying pests respond to ultraviolet light at nearly three times the intensity of visible light. Many insects possess photoreceptor cells tuned to short wavelengths, making UV sources a powerful signal.
A bug zapper light bulb exploits this by emitting a spectrum that mimics what pests naturally seek. The attraction follows a precise neurological process. When a mosquito or moth encounters this wavelength, its flight path changes immediately. Some insects follow heat, others follow flicker, but UV remains the primary lure.
I have seen homeowners place traps poorly, expecting results. Understanding the science shows why bulb quality and positioning affect performance. For South African evenings, choosing the right UV output determines the trap’s effectiveness.
Wavelengths That Maximize Effectiveness
One nanometre separates a working trap from a silent one. The optimal bug zapper light bulb emits a narrow UV peak near 365 nanometres, matching the sensitivity of common disease carriers in Gauteng. Wider spectra waste energy and attract fewer pests.
Three characteristics define a strong bulb:
- Accurate wavelength within a tight tolerance
- Consistent emission as the bulb warms up
- Low glare that does not compete with natural light
I have seen cheap bulbs drift to 385 nm after a few weeks. That shift reduces catches by nearly half! For a South African evening, the precise spectrum is not optional. It is the core of effectiveness.
Why Heat and Carbon Dioxide Play a Role
Each minute, a resting adult releases about 200 millilitres of carbon dioxide. That plume acts as a signal for flying insects in Gauteng. The UV output from a bug zapper light bulb creates the visual trigger, but heat and CO2 supply the final confirmation.
Insects possess antenna receptors that sense temperature differences as small as half a degree Celsius. Once the UV glow pulls them closer, a warm human body changes the local heat signature. This merging of signals explains why outdoor lights fail when they lack any source of warmth nearby.
- Carbon dioxide signals a breathing host
- Heat verifies a living, warm target
- UV light triggers the approach
Selecting the Right Replacement Bulb for Your Device
Matching Base Type and Voltage Requirements
A single voltage mismatch can render a bug zapper light bulb dead within a second. Before any replacement, inspect the cap geometry. South African fixtures predominantly use E27 screw bases, but imported units may employ B22 bayonet or G23 pin types. Installing a bulb with the wrong base leads to loose connections, flickering, and eventual arcing.
Voltage deserves equal scrutiny. Most local devices operate on 230V alternating current, while some commercial models step down to 12V or 24V. Feeding a 12V bulb with full mains voltage causes instant filament rupture. Conversely, placing a 230V lamp into a low voltage circuit produces a dim, useless glow that never draws pests near.
Evaluating Light Output and Coverage Area
Ten watts is not a magic number. The correct wattage for your bug zapper light bulb depends entirely on the device’s internal transformer and the manufacturer’s rating. Local units typically range from 7 to 15 watts. Installing a 15-watt bulb into a circuit designed for 7 watts will overheat the housing and melt the socket.
Light output dictates coverage area. A 7-watt bulb creates a tight lure zone of roughly 15 square meters. That is plenty for a small balcony. A 15-watt bulb expands that reach to around 40 square meters, which suits a suburban garden or warehouse corner.
The placement of the unit matters more than raw power. Consider the following:
– Install the trap away from competing lights
– Position it at least 6 meters from sitting areas
– Hang it at shoulder height or higher
More power is not always better. Oversized bulbs in confined spaces produce glare that repels pests instead of attracting them. I often see homeowners install a 15-watt bulb in a tiny courtyard. The result is a bright spot that skittish moths avoid entirely.
Measure the space first. If the room is a compact patio, stick with the lower range. If you need to cover a wide lawn, choose the higher wattage. Match the output to the territory, and the trap will perform exactly as intended. Give it that, and it will do its job.
Choosing Between Glass and Coated Bulbs
The glass envelope of a bug zapper light bulb is rarely inspected until the device goes dark. By that point, the choice between glass and coated surfaces becomes a question of patience. Untreated glass transmits more UV initially, yet it also lets visible light escape, which can create glare that deters insects. Coated bulbs filter that glare, extending the effective lure zone.
When comparing options, inspect the bulb’s finish carefully.
- Coated bulbs typically last longer because the coating reduces photodegradation of internal components.
- Clear bulbs offer maximum UV output but require careful placement to avoid competing with ambient lighting.
- Some coated bulbs use a phosphor layer that shifts the emission peak, so verify the wavelength range before purchasing.
The local climate also matters. Humid coastal areas in South Africa can cause premature socket corrosion, so a sealed base is worth more than a slight wattage difference. Select a bug zapper light bulb that matches both the transformer rating and the expected lifespan.
Energy Efficiency and Operating Costs
Your bug zapper’s transformer rating is a boundary, not a guideline. Fit a replacement bug zapper light bulb with higher wattage and you will shorten the device’s life. Match the specification exactly. The cost of a new unit far exceeds any perceived gain in brightness.
Operating costs deserve the same attention. A bulb that draws 15 watts but emits weak ultraviolet light will force your zapper to run longer. Over a South African summer, that extra runtime shows up on the municipal bill. The whole picture matters before purchasing:
- Compare the UV output per watt, not the raw wattage.
- Estimate the bulb’s lifespan against its retail price.
- Factor in the cost of frequent replacements.
In my experience, a cheap bulb that burns out twice as fast is no bargain. The extra rand spent on a quality bug zapper light bulb pays for itself in avoided replacements!
Ensuring Compatibility with Your Existing Unit
The socket accepts many bulbs, but the circuit tolerates only one specification. A bug zapper light bulb that fits the base yet changes the device’s resonant characteristics can overheat the transformer or underpower the grid. The manufacturer selected the original bug zapper light bulb for its ultraviolet spectrum, warm-up profile, and startup current draw. Alter any of those and the whole circuit behaves differently.
Physical dimensions matter beyond the base. A longer glass tube can sit too close to the charged grid, causing arcing that carbonizes the bulb surface. A shorter one leaves gaps in the attraction field. The seal quality around the electrodes deserves scrutiny, since moisture ingress is a recurring problem in coastal South African homes. The model plate holds the answer, and the exact OEM equivalent remains the safe path. A generic substitute that merely looks the same is a gamble.
Proper Installation and Handling Guidelines
Preparing the Unit Safely Before Replacement
South Africa’s erratic power grid makes every bulb replacement a moment for caution. Before you handle a new bug zapper light bulb, switch off the unit at the mains and wait five minutes. Capacitors store a charge that can deliver a sharp bite even when the switch is off. I keep insulated gloves near the fixture.
Inspect the socket for corrosion or moisture. A damp fitting will shorten the lifespan of any bug zapper light bulb. Check the gasket, if your model has one, and replace it when it cracks.
Remove the old bulb by twisting counterclockwise. Do not yank. If it resists, rotate it back and forth while pulling slightly.
Follow these steps:
– Turn off mains power.
– Wait for the bulb to cool.
– Use a dry cloth to grip the glass.
– Dispose of the old bulb in a sealed container.
South African units often sit on patios, exposed to dust and rain. Treat the replacement with the same respect you would any electrical component!
Step-by-Step Bulb Swap Process
Proper installation separates a dependable unit from a frustrating one. Once the socket is clean and dry, hold the replacement bug zapper light bulb by its base. Align the pins with the socket entry points, insert straight, then twist clockwise until you meet firm resistance. Stop there. Overtightening cracks glass or bends contacts.
Skin oils leave residue that creates hot spots on the glass, so use a cloth when handling the tube. This is where patience pays off.
Follow this sequence:
1. Align the base pins with the socket slots.
2. Press the bulb in gently, then rotate clockwise.
3. Stop at the first point of resistance.
4. Restore mains power and check for a steady glow.
If the bulb flickers, switch off and reseat it. A stable light confirms the swap is complete. Reattach any protective cage before testing to shield yourself from accidental contact.
Avoiding Common Installation Errors
A bug zapper light bulb remembers. Not the way people do, but the way glass does. Every fingerprint, every forced twist, every misaligned pin leaves a trace. Those traces surface as hot spots, micro fractures, and premature failure weeks after the unit goes back online.
The most common installation errors are invisible at first. I have opened units where a seemingly perfect installation still failed. The bulb glowed, the trap worked, then the glass darkened or died entirely without warning.
Frequent fault patterns include:
- Cross threading that damages the base pins
- Overtightening that stresses the quartz envelope
- Touching the tube with bare fingers, leaving oily residue
- Ignoring debris inside the socket before insertion
A bug zapper light bulb performs reliably when installed with clean hands and an honest assessment of socket condition. The glass does not forgive shortcuts. It only postpones the consequence.
Safety Gear and Electrical Precautions
Safety gear begins before the bulb does. The bug zapper light bulb itself holds no charge once the unit is unplugged, but the capacitor inside the housing does. That capacitor is the part that demands respect.
Wear insulated gloves when reaching into the assembly. Let the unit rest for ten minutes after disconnecting power. Test the socket contacts with a voltage tester.
A safe removal follows a quiet sequence:
- Switch off at the breaker, not the wall switch.
- Allow the capacitor to discharge fully.
- Wear dry insulated gloves during every contact.
The quartz envelope dislikes sudden temperature change, so ease the bulb gently from its socket and place it on a soft, dry surface before cleaning or replacement. The routine costs little time and prevents most early failures.
Maintenance Tips to Extend Bulb Longevity
Cleaning the Unit and Reflective Surfaces
Every bug zapper light bulb accumulates a film of Highveld dust, pollen, and cooking residue. That film dims the ultraviolet beam and makes the unit run hotter. Heat shortens component life. The reflective surface behind the bug zapper light bulb also degrades. A tarnished reflector scatters light randomly instead of directing it outward, which forces the bulb to work at higher intensity for the same coverage area. Over time, this extra strain reduces longevity.
To extend lifespan, clean the unit and its reflective surfaces regularly. Unplug the device and wait for the bulb to cool. Wipe the reflector with a microfibre cloth and warm soapy water, then rinse with a clean damp cloth. For the bug zapper light bulb itself, use a cotton swab to remove insect fragments and mineral deposits. Do not use abrasive pads; they scratch the finish and create permanent dull patches. A simple monthly check of these areas keeps your equipment efficient and preserves the bulb’s output.
When to Replace the Bulb for Best Results
Most people wait until a bug zapper light bulb goes dark before replacing it. By that point, the UV output has already dropped to a fraction of its original level.
Maintenance beyond cleaning matters. Check the rubber O-ring that seals the bulb housing each time you swap a unit. A cracked seal lets moisture and Highveld dust inside, which accelerates electrode wear. Keep the replacement bulb in its original packaging, away from direct sunlight. Heat and UV exposure degrade the phosphor coating before installation.
Watch for these warning signs:
- The nightly catch of flying pests drops noticeably
- The glass tube shows dark rings or blackened ends
- The unit buzzes louder than usual without a visible arc
If you notice any of these signs, replace the bug zapper light bulb immediately. Waiting extends the period of ineffective operation. Track running hours. After roughly 3,000 hours of evening use, swap the bug zapper light bulb as a precaution, even if it still glows.
Storing Spare Bulbs Properly
Keeping a spare bug zapper light bulb demands small discipline. Spares stored in a warm, damp cupboard rarely perform well later. The phosphor coating inside the tube ages quickly when exposed to heat and humidity.
Store spares upright in their original cartons, away from windows and geysers. A cool, dark shelf in the pantry works admirably. Handle the glass only with a dry cloth or cotton gloves; the oils from fingertips create hot spots that shorten the lifespan.
For the installed unit, switch it on only when the evening patrol is needed. Frequent on and off cycles stress the electrodes more than continuous running. Adopt these storage habits:
- Keep the carton sealed until needed
- Rotate stock so older bulbs get used first
- Mark the purchase date on the box
A spare bug zapper light bulb that waits in comfort will serve you well when the Highveld summer brings its nightly surge of insects.
Reducing Wear Through Regular Inspections
A bug zapper light bulb rarely fails without warning. Regular inspections of the bug zapper light bulb catch small problems before they become expensive failures. Every two weeks, turn off the unit and examine the bulb while it is cool.
Look for hairline cracks, blackened ends, or a dull phosphor coating. These signs indicate stress. Also inspect the socket for corrosion and the mounting clips for looseness. A wobbly bulb vibrates during operation, which wears down the electrodes faster.
- Check the glass for any clouding or dark bands
- Verify the bulb sits flush in its base
- Listen for buzzing that changes pitch during operation
Addressing these issues promptly extends the lifespan of your bug zapper light bulb. The phosphor coating degrades slowly when contacts stay clean and voltages remain stable.
Troubleshooting Flickering or Dim Output
Most South African households ignore a flickering bug zapper light bulb for weeks. That hesitation costs more than electricity. A failing bulb draws uneven current, stressing the ballast and the socket contacts. Flickering usually points to loose connections or a dying electrode, not a wiring fault.
Dim output is trickier. It often means the phosphor coating has degraded beyond recovery. I clean the tube, check the voltage at the socket, and inspect the reflector for grime. If the bulb still glows weakly, replacement is the honest answer.
When flickering appears, a simple order of operations helps:
- Switch off power and wait ten minutes.
- Remove the bulb and inspect pins for scorch marks.
- Wipe the socket with a dry cloth.
- Reinsert firmly, then test.
This routine keeps your bug zapper light bulb working through high mosquito seasons without surprise failures.
Seasonal Usage and Its Impact on Lifespan
South Africa’s mosquito season doesn’t run on a single calendar. In KwaZulu-Natal, the zapper works from September to May. In the Cape, it stays busy through the rainy winter. Your bug zapper light bulb needs a schedule, not constant operation!
I once found a bulb that had been burning for eleven months straight. Its phosphor coating was gone. Seasonal switching protects the electrodes and the ballast. A short list for seasonal care:
- Mark the start of the high season on your phone.
- Give the bulb a break for at least two months.
That keeps it alive for another summer.
Placement Strategies for Maximum Insect Capture
Distance from Competing Light Sources
The evening air carries a hundred small navigators, each hunting for the brightest signal. A bug zapper light bulb only wins when competing glows stay distant. I place mine twenty paces from the neighbour’s security beam. Distance matters because insects compare sources before committing. To stretch capture range, tilt the bulb so no reflective patio door throws a second flare. Avoid placing it near water, because still pools reflect ultraviolet.
The strategies are simple:
- Position the zapper on the outer edge of your veranda.
- Mount it above head height, facing open ground.
- Let no ambient lamp sit within the same sightline.
These choices allow the bulb to dominate the surrounding darkness.
Height and Positioning Around Activity Zones
Insects ride the rising heat of a warm evening, so elevation decides how far the attraction reaches. Mount a bug zapper light bulb at least two and a half metres up. This places the ultraviolet source above the heads of seated guests and gives the capture grid a wider downward sweep.
Around the active zones of a veranda or braai area, the approach changes. You want the lure at the perimeter, not the centre. Place it near the edge of the patio, facing the garden, so flying pests meet the grid before they reach the table.
- Keep the unit about three metres from dining chairs
- Set it clear of pergola posts that shadow the glow
- Aim the bulb across open lawn toward dense bush
When the bulb holds the boundary, the space behind it stays calm. A bug zapper light bulb does the work while you enjoy the night.
Placement Relative to Entry Points and Outdoor Areas
In South Africa, the gap beneath a kitchen door is a direct route for moths and mosquitoes. That is why the entry point deserves a bug zapper light bulb before any other position. Hang the unit two metres from the opening, angled so the glow does not spill into the house. If the light falls directly on the threshold, it draws insects through the gap instead of stopping them.
Outdoor areas need their own logic. A bug zapper light bulb works hardest where moisture gathers, near drain gullies, plant pots, or the edge of a lawn after irrigation. These are the breeding spots where flies multiply and mosquitoes rest.
- Place the unit near a gate or pathway that carries foot traffic from the garden
- Set it upwind of the braai area so the lure catches insects before they reach the smoke
- Keep it clear of pet water bowls and birdbaths, which draw competing attention
Position the unit according to how pests actually travel. They follow heat, moisture, and the smell of people. Place the bug zapper light bulb accordingly, and the evening stays yours.
Avoiding Obstructions That Reduce Range
Consider what stands between the bulb and the searchings of a moth. A wall corner, a hanging pot, each obstacle subtracts distance from the effective radius. A common mistake places the unit behind a chair, reducing the range to nothing.
The bug zapper light bulb demands a clear line of sight. Survey the space from the insect’s angle. A leaf in the breeze, a coiled hose, or a stack of firewood will cast a shadow and reroute the flight path. The usual obstructions are:
- Overhead branches that block the upward beam
- Furniture or plants within three metres of the glow
- Tool handles leaning across the light
I once watched a unit fail because a wet towel hung from a clothesline in its path, turning a full range into a faint patch. Without a clear path, the bug zapper light bulb becomes a decoration.
Coordinating with Other Pest Control Methods
Insects follow predictable routes to your patio, and the bug zapper light bulb captures them best when you respect those pathways. Position it between the breeding ground and your gathering area, such as near a damp flowerbed or a compost heap. This intercepts pests before they cross the boundary.
Coordinating with other controls multiplies the effect. The zapper handles flying adults, while removing standing water disrupts mosquito reproduction. A residual barrier spray on perimeter walls catches crawlers that never fly into the light. The combination includes:
- Stagnant pools of water treated monthly
- Garden debris cleared from the path
- Outdoor bulbs kept dimmer than the zapper
These efforts reinforce each other, yet the bug zapper light bulb remains the core element of the system, pulling insects away from sheltered corners where they breed.
Common Mistakes and How to Avoid Them
Leaving the Unit Off During Peak Mosquito Hours
Sunset in Durban doesn’t simply mark the end of the day. It signals the start of the mosquito’s most aggressive hunting window. I’ve watched homeowners switch off their units right as the swarm emerges, thinking the threat has passed. The insects are most active between dusk and two hours after dark, and again during the hour before sunrise. That’s when the bug zapper light bulb matters most. If it’s off, the night belongs to the mosquitoes.
Consider the times when your family is actually outside. Braai areas, pool decks, garden paths. If the unit isn’t running during those windows, it’s an ornament. The bug zapper light bulb must stay on through those peak periods. Run it through the entire evening. Let it cycle through the pre-dawn hours. The mosquitoes don’t wait for a convenient moment, and neither should your defence.
Focusing Solely on Visible Light Output
Ask a hundred South Africans how their bug zapper light bulb is performing and half will squint at it and guess. The human eye is a poor instrument for measuring pest control. The visible glow is mostly wasted energy. The real action happens in the ultraviolet range, which we cannot see. A dull-looking bulb can lure mosquitoes from across the garden, while a brilliant white tube might be doing absolutely nothing.
Frequent mistakes we spot:
- Replacing a healthy UV bulb because it looks faint
- Choosing the brightest bulb on the shelf instead of the correct wavelength
- Positioning the unit for visual appeal rather than coverage
Mosquitoes do not care about aesthetics. They respond to ultraviolet light, not your sense of style. Read the output specifications. Your bug zapper light bulb is not a lamp, so stop judging it like one.
Ignoring Bulb Age and Degradation Rate
Time works against every bulb. A bug zapper light bulb does not announce its failure with a flicker or pop. It quietly loses UV intensity while still glowing visibly. Most users never track operational hours, so the unit runs far past its effective window.
The degradation rate depends on bulb quality and duty cycle. A cheap bulb can shed half its ultraviolet punch within two thousand hours. A premium one lasts longer, but the decline is relentless. Ignoring this curve is the most common mistake we encounter.
Consider factors that accelerate the damage: high ambient temperatures, frequent on and off cycles, and voltage fluctuations. Each one steals lifespan from the bulb.
Using Incompatible Bulbs That Damage the Unit
One wrong twist turns a simple swap into a costly repair. I watched a 230-volt bulb forced into a 12-volt socket melt the contact pins beyond recognition. A bug zapper light bulb carries specific wattage, base, and electrical ratings. When those ratings clash, the transformer overheats, the socket corrodes, or the circuit board dies.
Installing a bug zapper light bulb with the wrong base strips the threads and creates arcing. A higher wattage bulb pushes the transformer past its thermal limit. Ignoring the voltage rating causes instant burnout and internal shorts. These failures surface months later, after the warranty lapsed.
- A bulb with a slightly larger base damages the contact pins on insertion.
- An oversized wattage bulb overheats the transformer and melts wiring.
- A voltage mismatch can fry the circuit board on the first power cycle.
A mismatched bulb runs hotter, flickers strangely, and fails early. The damage is irreversible.
Incorrect Cleaning Techniques That Reduce Performance
Scrubbing a bug zapper light bulb with a wet cloth while the unit is still warm can cause thermal shock and micro-cracks. Those tiny fractures scatter ultraviolet light and cut attraction range dramatically. Many owners also use harsh chemical sprays that leave a film on the glass, blocking the wavelengths that mosquitoes actually see.
- Wiping the bulb with solvent-based cleaners strips the protective coating.
- Using rough scouring pads scratches the surface and traps debris.
- Cleaning during operation risks electrical shock.
Each of these mistakes lowers output gradually, so the decline goes unnoticed until catches drop off. A bug zapper light bulb that looks clean but carries invisible residue will underperform all season. The best approach treats the bulb like precision equipment, not a kitchen fixture.