
Common Reasons Why Your Bug Zapper Light Might Not Be Working
Electrical Issues
Electrical issues are a common culprit behind the bug zapper light not working. Power surges, faulty wiring, or blown fuses can all disrupt the electrical flow that keeps your device functioning properly. If your bug zapper light not working unexpectedly, it’s worth inspecting the power source first. Sometimes, the problem isn’t with the device itself but with the outlet or circuit it’s connected to.
In many cases, the internal wiring may have become loose or damaged over time, especially in outdoor environments where exposure to elements is inevitable. This can cause interruptions in the electrical circuit, rendering the bug zapper light not working.
Additionally, check the fuse or circuit breaker; a tripped breaker could be the root cause. If you’re comfortable with basic electrical work, testing these components can quickly reveal whether the issue is due to electrical faults. Otherwise, consulting a professional is the safest route to ensure your device is repaired properly.
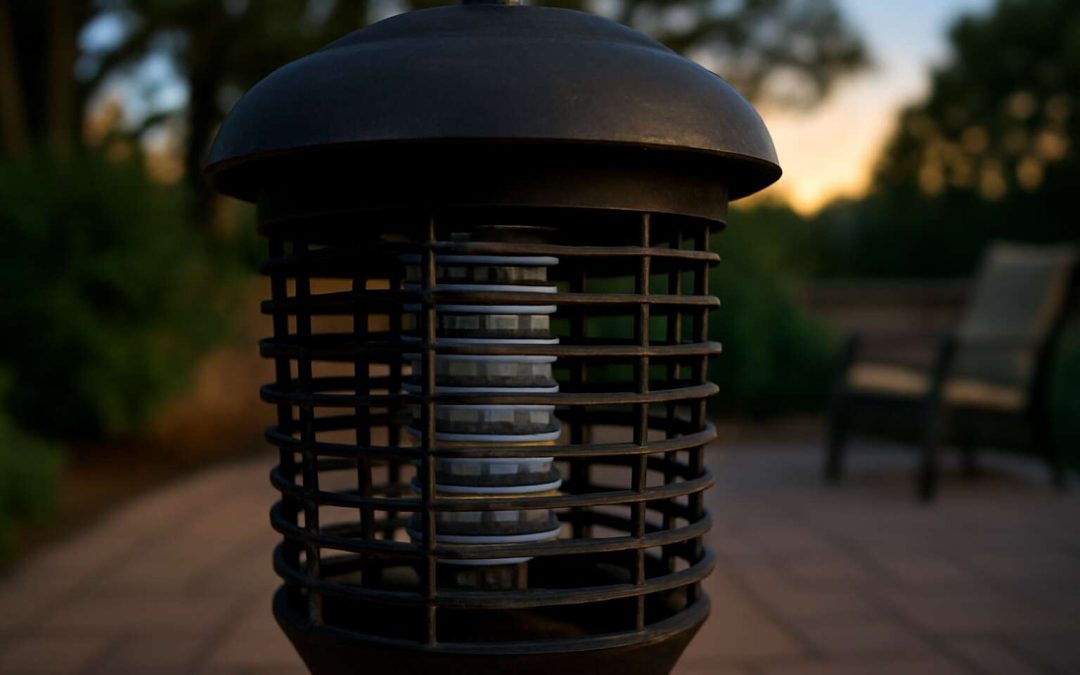
Bulb and Bulb Holder Problems
When the bug zapper light not working becomes an unwelcome mystery, the culprit might lie beyond the obvious electrical faults. Often overlooked are the delicate components that bring illumination to life—namely, the bulb and bulb holder. These seemingly simple parts hold the key to a functioning device, yet their failure can silently sabotage your insect control efforts. A worn-out bulb, for instance, can diminish the zapper’s effectiveness, casting darkness over what should be a lively scene of insect eradication.
Moreover, the bulb holder itself may be compromised—corrosion, loose connections, or physical damage can prevent proper contact, stalling the electrical circuit needed to energize the light. Sometimes, the fix is straightforward: replacing the bulb or tightening the holder. However, in more insidious cases, internal wiring within the holder might have fractured, making the entire assembly unreliable. If your bug zapper light not working persists despite checking the power source, don’t overlook these vital components—they’re often the unseen culprits behind the malfunction.
Internal Component Failures
Internal component failures can quietly sabotage your bug zapper’s effectiveness, even when the power source appears flawless. Over time, internal wiring within the light assembly may degrade or fracture, making the bug zapper light not working despite a steady electrical supply. These hidden faults often escape notice until the device stops attracting insects altogether. The delicate connections inside the bulb holder can become loose or corroded, interrupting the circuit needed to energize the light. In some cases, internal switches or sensors may malfunction, preventing the light from turning on at all. Recognizing these subtle signs can be the first step toward restoring your insect control.
Sometimes, the issue isn’t immediately apparent—an internal failure might be the culprit, especially if the external components seem intact. In such situations, inspecting the wiring and internal connections with care can reveal the root cause. If the internal wiring is damaged, replacing the affected parts might be necessary to get your bug zapper light not working back in action. This hidden complexity underscores why internal component failures are a common, yet often overlooked, reason behind malfunctioning bug zapper lights.
Troubleshooting Steps for Bug Zapper Light Issues
Checking Power and Connections
In the shadowed corners of your outdoor sanctuary, the glow of your bug zapper light not working can feel like a harbinger of nature’s unchecked chaos. Before despair takes hold, take a moment to investigate the simplest yet often overlooked culprit—power and connections. A flicker of doubt might reveal a loose plug or a tripped circuit breaker lurking in the darkness, silently sabotaging your defenses against relentless pests.
Ensure that the bug zapper is properly plugged into a functioning outlet. Sometimes, the culprit is as mundane as a switch left in the off position or a blown fuse that needs replacement. Carefully inspect the power cord for any signs of damage or fraying, for these silent threats can disrupt the flow of electricity, rendering the device inert. If the light still refuses to shine, consider testing the outlet with another device—sometimes, the problem isn’t with the zapper but with the power source itself.
If your bug zapper light not working persists, follow this sequence to uncover the darkness hiding behind the scenes:
- Verify the outlet is delivering power by plugging in a different device.
- Check the power cord and connections for signs of wear or damage.
- Ensure the switch is in the correct position and the circuit breaker hasn’t tripped.
Only when these steps are completed can one truly begin to uncover whether an unseen electrical whisper has silenced your insect foe or if the darkness is a deeper, more insidious fault.
Replacing the Bulb
When your bug zapper light not working, it’s easy to assume the worst—like a swarm of uninvited pests taking over your outdoor space. But sometimes, the fix is as simple as replacing the bulb. After all, even the most sophisticated bug zapper relies on a tiny, fragile component: the bulb. Over time, bulbs can burn out or become less effective, leaving your insect-fighting fortress in the dark.
To troubleshoot this pesky issue, start by unplugging your device and carefully removing the existing bulb. Inspect it for signs of blackening, cracks, or a burned-out filament—common indicators it’s time for a replacement. When choosing a new bulb, ensure it’s compatible with your specific bug zapper model, as not all bulbs are created equal. Installing the new bulb is straightforward: insert it gently, making sure it’s securely fitted.
Remember, a fresh bulb often makes all the difference, turning your bug zapper light not working into an illuminating victory against mosquitoes and other flying nuisances. For a seamless swap, consider keeping a spare bulb handy—because nothing kills the vibe faster than a dark backyard and a swarm of pests.
Inspecting Internal Components
In the silent battleground of your backyard, the most insidious enemy often lurks unseen—tiny invaders drawn to the glow of your bug zapper light not working. To truly understand the root of the problem, it’s essential to peer beneath the surface and scrutinize the internal components that power this insect eradication device. Sometimes, the issue isn’t with the bulb itself but with the intricate circuitry that sustains its glow. A subtle malfunction within the internal wiring or the electronic board can cause the bug zapper light not working, despite all external appearances seeming fine.
Careful inspection involves disconnecting the device from its power source and opening the casing with gentle precision. Once inside, look for signs of corrosion, burnt circuit traces, or dislodged connectors—these are often the silent culprits. An effective troubleshooting step is to test the internal wiring continuity with a multimeter, ensuring each connection remains uncompromised. Sometimes, a tiny, overlooked component like a resistor or capacitor might have failed, disrupting the entire illumination process.
For those who prefer a systematic approach, following an ordered process can be illuminating:
- Unplug the device and remove the cover.
- Visually scan for obvious signs of damage or corrosion.
- Test internal wiring and circuit continuity.
- Check for loose or disconnected components.
By delving into these internal depths, you often uncover the hidden faults that cause the bug zapper light not working, restoring not just illumination but your peace of mind in the ongoing war against flying pests.
Preventative Maintenance to Keep Your Bug Zapper Working
Regular Cleaning and Inspection
Preventative maintenance is the unsung hero in ensuring your bug zapper light continues to work flawlessly. Neglecting routine cleaning and inspection can turn a reliable device into a dormant fixture, especially when the bug zapper light not working becomes a common complaint. Regularly removing debris, dead insects, and dust from the grid not only enhances effectiveness but also prolongs its lifespan. Think of your bug zapper as a living entity—neglect it, and it will fade into silence.
To keep your bug zapper in top form, schedule monthly inspections. Look for signs of corrosion, damaged wiring, or any unusual wear that might impede its operation. In South Africa’s humid climate, internal components can corrode quickly, leading to the bug zapper light not working when you need it most. A simple maintenance routine can be the difference between a pest-free outdoor space and a swarm of unwanted guests.
- Unplug the device before inspection.
- Gently clean the grid and surrounding areas with a soft brush or cloth.
- Check for signs of corrosion or damage to internal parts.
- Ensure the insect tray is empty and properly positioned.
Proper Placement and Usage
Even the most advanced bug zapper can be rendered useless if not positioned with care and purpose. Proper placement is an art—placing your device in the right location can mean the difference between a pest-free haven and relentless annoyance. Position the bug zapper light not working is often a symptom of poor placement—near bright lights or wind-swept areas, the device loses its effectiveness.
To optimize performance, consider these guidelines:
- Keep the bug zapper away from competing light sources that can distract insects.
- Place it at least 1.5 to 2 meters above the ground for maximum coverage.
- Ensure it’s situated in shaded areas, away from direct sunlight which can diminish its attraction power.
A well-placed bug zapper is not just about aesthetics—it’s about creating an environment where insects are irresistibly drawn, and the bug zapper light not working becomes a distant memory. Strategic positioning also prolongs the device’s lifespan and maintains its efficacy, making every insect caught a small victory in your outdoor sanctuary.
Using Quality Replacement Parts
Maintaining the longevity and effectiveness of your bug zapper goes beyond simple troubleshooting. A crucial aspect often overlooked is using quality replacement parts, which can dramatically influence whether the bug zapper light not working becomes a persistent frustration or a distant memory. Over time, even the most durable devices benefit from thoughtful upgrades—like replacing worn-out bulbs or internal components with genuine, high-grade parts.
Implementing preventative maintenance routines ensures your device remains an unwavering sentinel against pests. Regularly inspecting the wiring and connections—beyond basic cleaning—can preempt the onset of electrical issues that cause the bug zapper light not working. Additionally, using certified replacement bulbs designed specifically for your device not only revitalizes its allure but also safeguards against compatibility issues that could compromise performance.
For optimal results, consider the following:
- Always opt for high-quality replacement bulbs and internal components.
- Keep spare parts on hand to facilitate quick repairs and prevent prolonged downtime.
By embracing a proactive approach to maintenance, you transform your bug zapper from a mere appliance into a resilient guardian of your outdoor space. Every small investment in quality parts and routine checks ensures that the bug zapper light not working is an anomaly of the past, allowing your environment to remain pest-free with minimal fuss.
When to Seek Professional Repair or Replacement
Signs of Internal Damage
When the bug zapper light not working persists despite troubleshooting, it’s time to recognize the subtle signs of internal damage. Often, a flickering or inconsistent glow hints at deeper issues that simple repairs can’t resolve. Internal components may have become corroded or broken, causing the device to lose its electrifying edge. Ignoring these signs can lead to a complete failure, leaving your outdoor space vulnerable to pests.
If the bug zapper light not working is accompanied by unusual noises or a burning smell, these are red flags indicating internal damage. In such cases, inspecting for signs like scorch marks or melted parts becomes essential. Sometimes, the damage is not immediately visible but evident through decreased effectiveness over time. When these symptoms surface, seeking professional repair or replacement becomes not just advisable but necessary to ensure safety and optimal operation. Remember, internal damage doesn’t always show on the surface but can silently undermine your pest control efforts.
Warranty and Support Options
When the bug zapper light not working becomes an unyielding annoyance, it’s essential to recognize the limits of DIY repairs. Sometimes, the internal damage or electrical faults are beyond the scope of a quick fix, and attempting to force a solution can do more harm than good. That’s precisely when professional repair or replacement becomes not just advisable, but necessary.
If your device is still under warranty, contacting the manufacturer’s support team often proves to be the most prudent course of action. Many warranties cover electrical failures, provided the damage isn’t caused by misuse. For those who’ve exhausted troubleshooting efforts, seeking expert assistance ensures safety and preserves the integrity of your pest control system.
In cases of persistent issues, consider consulting a licensed technician who specializes in electrical appliances. They can accurately diagnose the problem, whether it’s internal component failure or wiring issues, and suggest the most effective resolution. Remember, a malfunctioning bug zapper light not working can silently undermine your outdoor pest control efforts—sometimes, only a professional touch can restore its electrifying prowess.
Cost-Effective Solutions
When the bug zapper light not working persists despite your best efforts, recognizing when to seek professional repair or replacement becomes crucial. Often, the cost of ongoing troubleshooting can surpass the investment in expert intervention, especially when electrical faults or internal damage are involved.
If the device is still under warranty, contacting the manufacturer’s support team can save you time and money. Many warranties cover electrical failures, provided misuse isn’t a factor. For those encountering recurring issues, consulting a licensed technician can be a game-changer. They possess the tools and expertise to diagnose hidden faults like wiring problems or internal component failures that are not always apparent.
Cost-effective solutions sometimes involve replacing the entire unit, particularly if the bug zapper light not working is caused by irreparable damage. In such cases, prioritizing professional assessment ensures your pest control system remains functional and safe. After all, a malfunctioning bug zapper light isn’t just inconvenient—it can silently undermine your outdoor pest management efforts!