
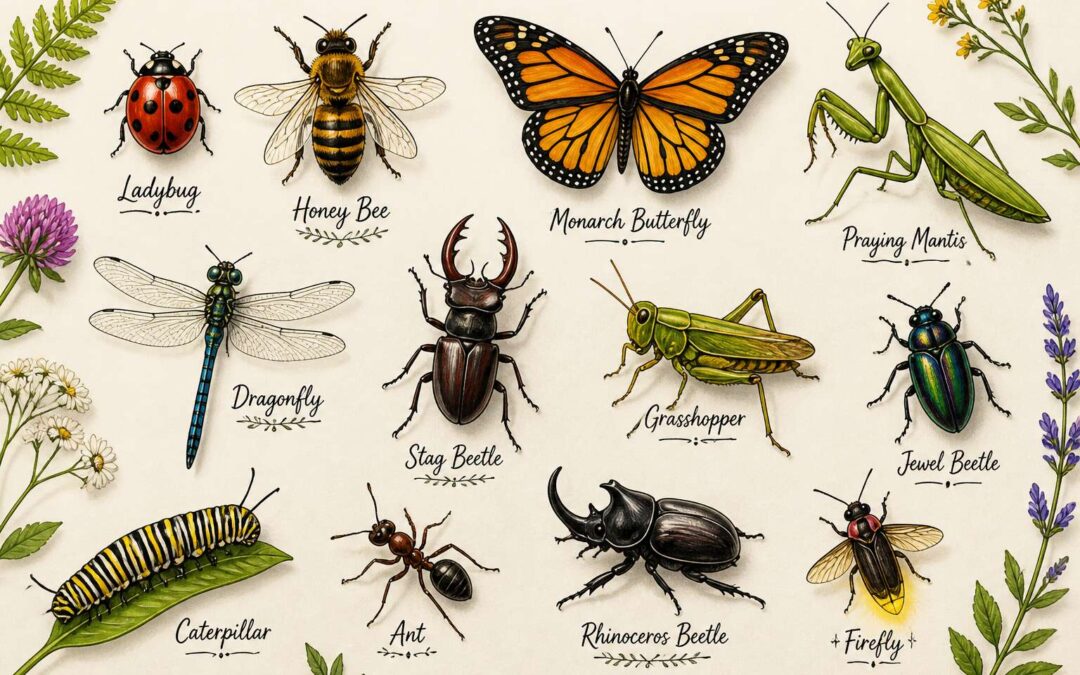
Getting Started with Insect Illustration
The garden at dusk hums with a quiet intensity, a living tapestry of chitin and wing. To capture this world on paper is to slow down time itself, to notice the delicate architecture of a beetle’s shell or the geometric lace of a dragonfly’s wings. Moving past simple observation into the realm of insects drawing with names transforms a casual sketch into a form of storytelling, a way to give voice to the smallest of our co-inhabitants.
When you begin your artistic journey, resist the urge to rush. Sit with your subject, let it move, and draw from life when possible. The initial pencil lines are a conversation, not a commitment. Focus on the shape of the thorax, the angle of the antennae, and the way light catches the curve of an abdomen. It is in these quiet details that the magic lives. A helpful first step involves a simple process:
1. Sketch a broad, light oval for the body’s main mass to establish posture.
2. Add the head and the segmented thorax, comparing their relative sizes carefully.
3. Block in the legs and antennae with straight, gestural strokes before rounding them out.
4. Once the structure feels solid, begin to layer in the wing cases and textured patterns.
After the structure is solid, bring your identification skills into play. This is where the true enchantment of insects drawing with names begins. As you label your work with the correct nomenclature, whether it is a Danaus chrysippus or a common Ladybird, you forge a deeper connection. The name is not just a label; it is an entry point into the creature’s entire world, its habits, and its habitat. Your pencil becomes a tool for discovery, and the sketchbook a field guide to wonder.
Anatomy Essentials for Accurate Insect Drawings
Studying insects up close is a humbling exercise. A honeybee’s wing veins and a dung beetle’s leg joints require attention that changes how you see them entirely. When I sketch a praying mantis, I first examine the prothorax, the spiracles along the abdomen, and the tiny tarsi at the end of each leg. These details anchor the drawing in observable truth, not guesswork.
Focus on these essentials before touching pencil to paper:
- The segmentation of the thorax and abdomen
- The number of leg joints and their angles
- The position of antennae relative to the eyes
Field guides from the Karoo and the Cape Flats show how local species vary in subtle ways. Pairing each sketch with its proper label makes insects drawing with names, a practice that sharpens your observation skills tremendously. The most honest portrait of a beetle is one where every segment carries purpose, from the hardened elytra to the exposed membrane beneath.
Step-by-Step Drawing Guides for Common Insects
There is something almost meditative about rendering a ladybird’s elytra or a bee’s wing in graphite. A step-by-step approach helps you capture the symmetry that makes insects drawing with names feel approachable, even for a complete beginner. Start with basic shapes, then layer details like antennae and the delicate venation of each wing.
- Begin with an oval for the thorax, the body’s powerhouse.
- Add the head and abdomen, keeping proportions loose.
- Sketch jointed legs and antennae using light, exploratory strokes.
Take a honeybee as your first subject. Its thorax is a fuzzy ellipse, while the abdomen narrows abruptly toward the stinger. Each step refines your observation, and soon you notice smaller truths, like the striations on a dung beetle’s carapace or the compound eyes of a mantis. Learning the names anchors your memory, turning a quick sketch into a lasting lesson.
Effective Labeling Techniques for Educational Art
Every dung beetle in your garden has a name, and someone has to write it down. Labeling insects drawing with names sounds simple, but I have seen students turn a detailed mantis sketch into a confusing mess of arrows and guesswork.
The secret lies in technique. A label should sit outside the drawing, connected by a clean line. Write horizontally, never at odd angles.
- Draw the insect first, then plan label placement
- Keep leader lines straight and parallel
- Print names in lowercase, except the genus
These details matter because a scientific illustration depends on its clarity. Done well, this practice turns observation into knowledge, and that is a quiet act of respect.
Creative Projects and Applications for Labeled Insect Drawings
Over 900,000 living insect species have been catalogued, yet most people can name fewer than fifty. That gap between vast existence and personal knowledge is where the power of labeled illustrations begins to work its magic. The simple act of writing a name next to a detailed sketch transforms a fleeting encounter into a moment of recognition. It turns the chaotic hum of the veld into a roster of individual identities, each with its own story.
This practice extends far beyond the classroom. An insect drawing with names becomes a foundational tool for citizen science initiatives, where local observers can accurately contribute to biodiversity databases. It also fuels the creative fire for pattern designers and tattoo artists who study anatomical accuracy to build their unique styles. The deliberate pairing of scientific nomenclature with artistic interpretation creates a rich visual language that bridges the gap between laboratory and art studio.
Consider the variety of projects that benefit from this detailed approach:
– Field journals for national park guides in Kruger, where quick reference is vital.
– Educational posters for community gardens focused on beneficial pollinators.
– Personal herbarium-style prints for home decor that celebrate local fauna.
– Digital assets for wildlife blogs explaining the subtle differences between similar species.
Each application relies on the same principle of clarity. When an artist captures the delicate venation of a dragonfly’s wing or the segmented armor of a beetle, the name serves as the anchor. It grounds the aesthetic beauty in observable fact, allowing the viewer to move from passive admiration to active understanding. The lines on the page become a conversation starter, a testament to the patient observation that produced them.